Get in touch
647-982-2108
yourfriends@techdirection.com

Harnessing the Power of NDI in QLab

Dan Nagle • Apr 19, 2023

How-to Get Started with NDI Cameras and Sources using QLab

In today's digital age, live productions are constantly evolving, and new technologies continue to revolutionize the way we create and deliver captivating experiences. One such technology is NDI (Network Device Interface), which enables seamless transmission of high-quality video and audio over standard computer networks. And when it comes to incorporating NDI cameras and sources into your live productions, QLab is the perfect companion to unleash their full potential. In this step-by-step guide, we'll walk you through the process of connecting and testing an NDI source within QLab.


Step 1: Setting Up Your NDI Network

The first step is setting up your NDI network correctly. Connect your NDI-enabled devices or cameras to the same network as your computer running QLab 5. Ensure that each device has a unique IP address and that all devices can communicate within the network.


Step 2: Installing and Configuring NDI Tools

To incorporate NDI sources in QLab 5, the NDI Tools software suite is essential. It's available for both macOS and Windows. Download and install NDI Tools from the official NDI website (ndi.tv/tools). Once installed, run NDI Scan Converter. This tool lets you broadcast your computer's screen or specific application windows as NDI sources.


Step 3: Testing NDI Sources in QLab

With the NDI Tools installed and running, it's time to check your NDI sources within QLab:

  1. Open QLab and create a new workspace or open an existing one.
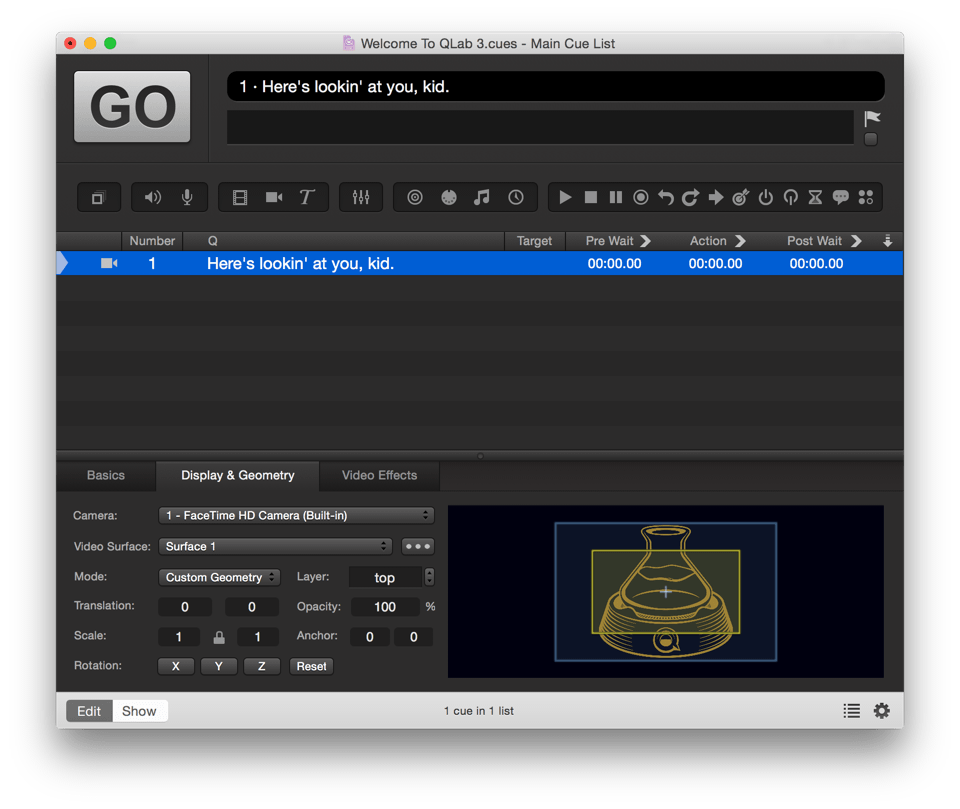
  2. Navigate to the "Cue List" in the workspace and click the "+" button to add a new Video Cue.
  3. Select your new video cue and navigate to the "Display & Geometry" tab in the inspector panel.
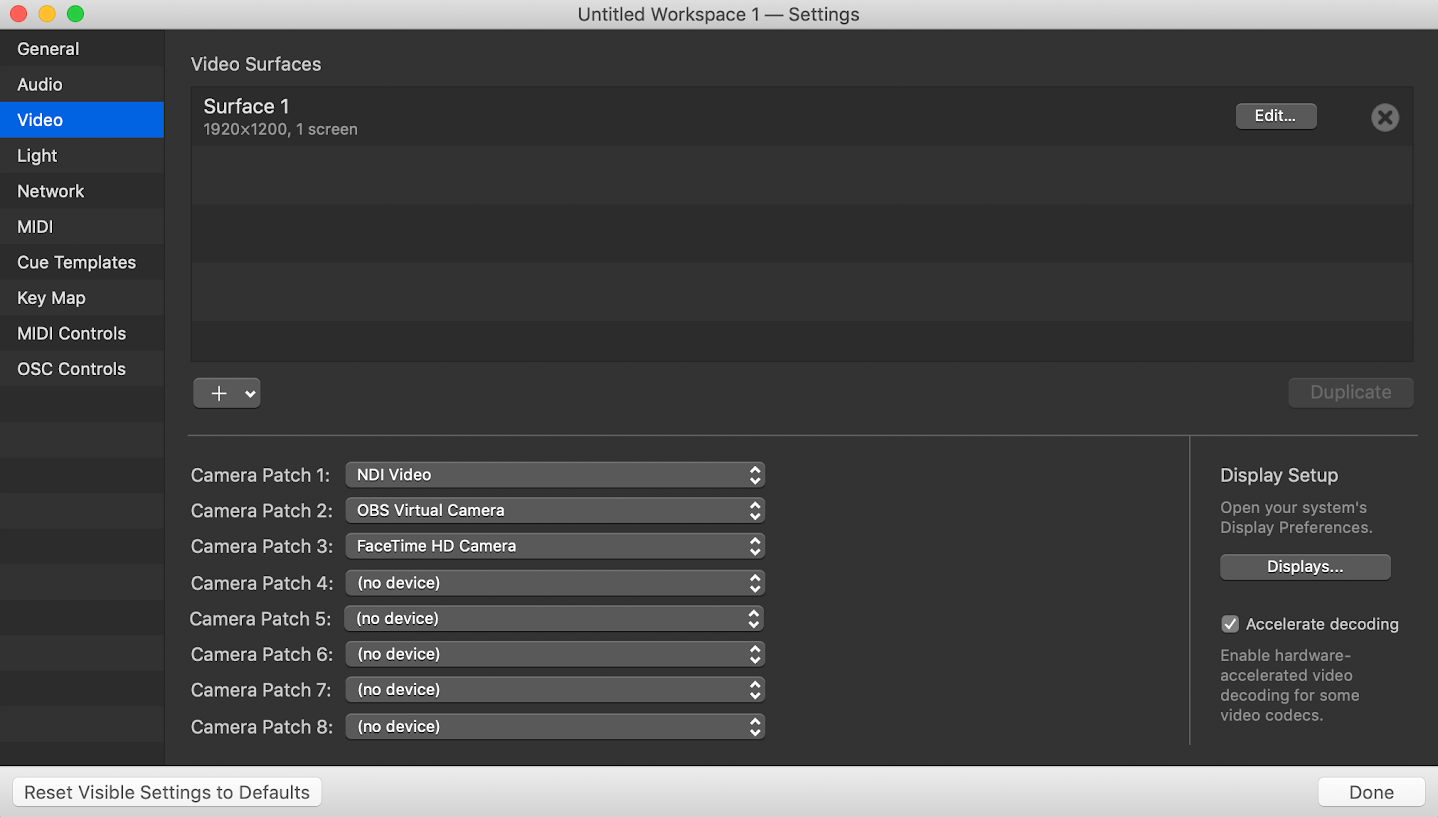
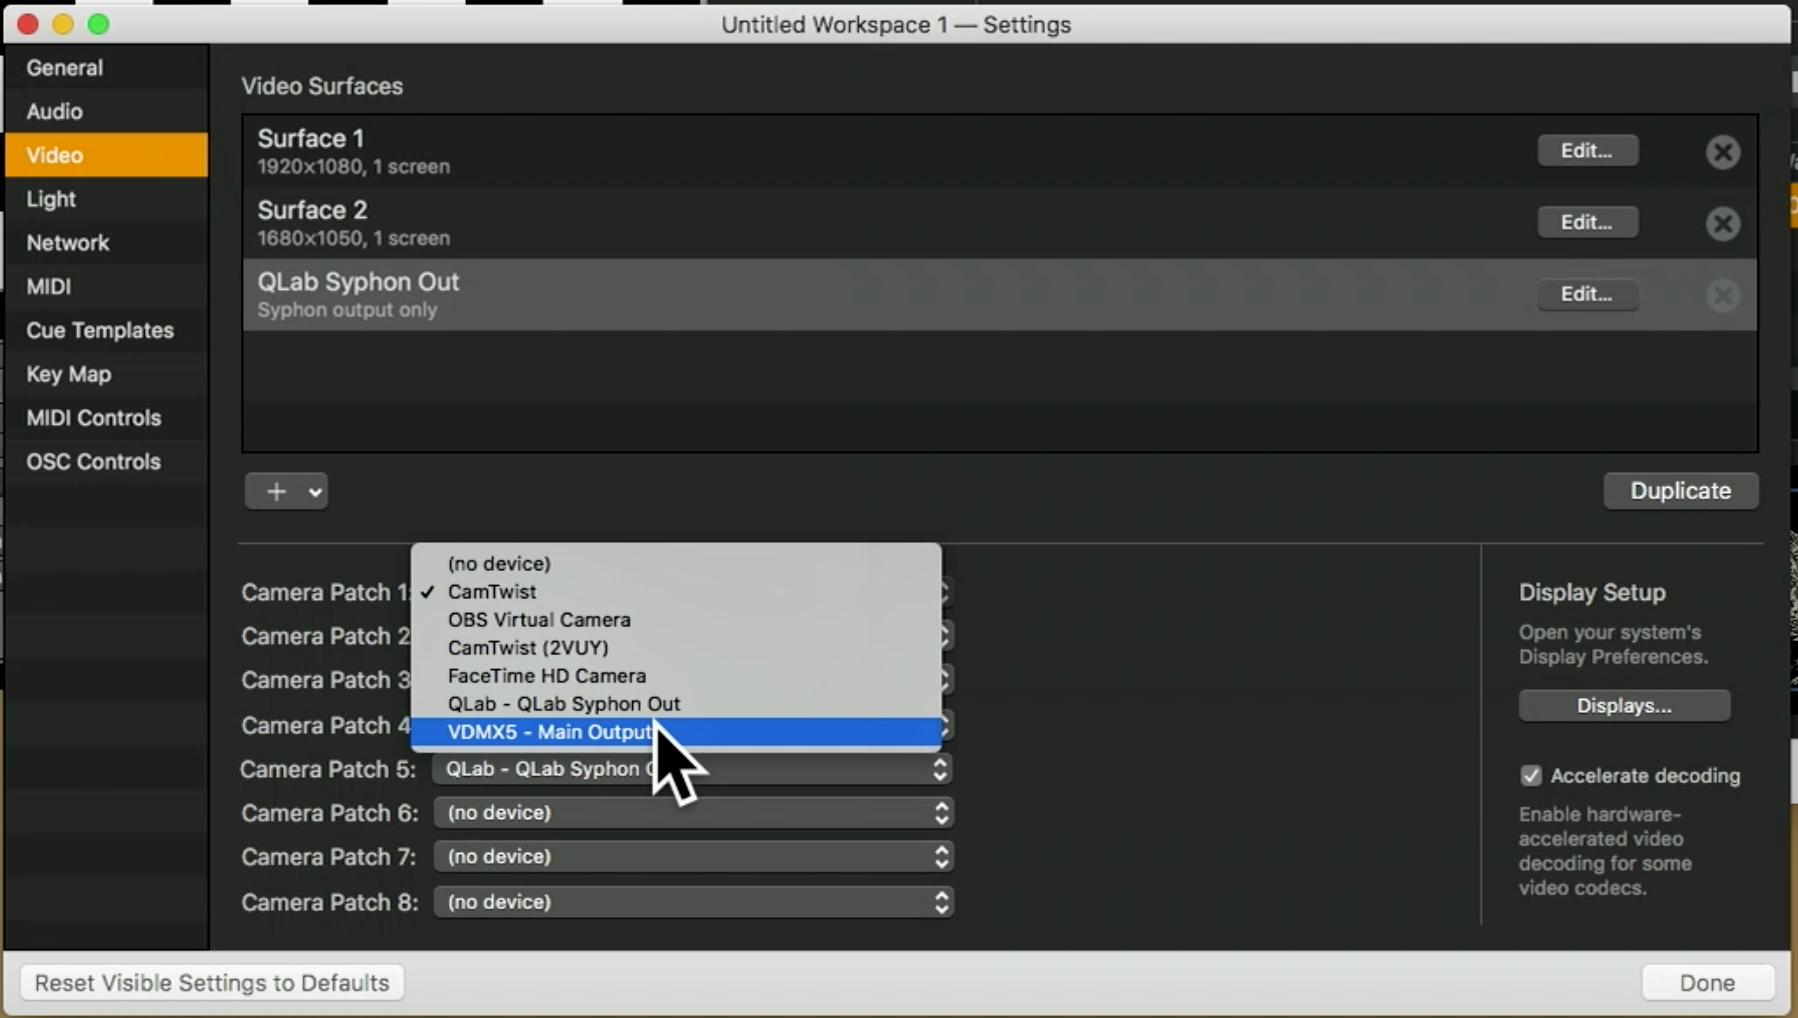
  4. In the "Surface" dropdown menu, select the video surface you want your NDI source to be projected onto.
  5. In the "Source" section, select "Network (Syphon/NDI)" as the source type.
  6. QLab will automatically find any available NDI sources on your network. Select the appropriate NDI source from the list.
  7. Tweak the properties of your video cue as needed. This could include changes to position, scale, and opacity.
  8. Preview your NDI source by hitting the "Go" button or pressing the space bar on your keyboard.
  9. If your NDI source shows up as anticipated, you're good to go! If not, recheck your NDI network configuration and ensure your NDI source is correctly set up and visible within NDI Tools, then try again.


Step 4: Advancing Your NDI Workflow

Successfully testing an NDI source in QLab opens up a world of possibilities. You can blend multiple NDI sources, integrate them with other multimedia elements in cues, and use QLab's robust automation features to design complex, synchronized sequences.

NDI cameras and sources bring flexibility and simplicity to live productions, doing away with the need for extensive cabling and hardware. With QLab 5 as your command center, integrating NDI sources into your creative vision becomes a breeze, allowing you to captivate your audience with stunning visual experiences.


Note: NDI is a registered trademark of NewTek, Inc. and is not affiliated with Tech Direction.

  • What is NDI and how does it work?

    NDI (Network Device Interface) is a technology developed by NewTek that enables high-quality video and audio transmission over standard computer networks. It allows devices such as cameras, computers, and media servers to communicate and share content seamlessly, eliminating the need for physical video cables. NDI works by encoding and transmitting video and audio data over IP (Internet Protocol) networks, making it easily accessible and flexible for live production workflows.

  • How do I set up an NDI source in QLab?

    Setting up an NDI source in QLab is straightforward:


    Ensure your NDI-enabled device, such as a camera or NDI-enabled software, is connected to the same network as the computer running QLab.


    Install the NDI Tools software suite on your computer and launch NDI Scan Converter.


    Configure NDI Scan Converter to share your desired video source.


    In QLab, create a video cue and select "NDI" as the source type.


    Choose the desired NDI source from the available options in the dropdown menu.


    Adjust the cue properties and preview the NDI source within QLab.

  • Can I use multiple NDI sources simultaneously in QLab?

    Yes, QLab fully supports multiple NDI sources simultaneously. You can create multiple video cues, each assigned to a different NDI source, and incorporate them into your workspace as needed. QLab provides the flexibility to manage and manipulate multiple NDI sources, allowing you to create dynamic visual compositions for your live productions.

  • Can I synchronize NDI sources with other elements in QLab, such as lighting and audio cues?

    Absolutely! QLab's timeline-based interface allows you to synchronize NDI sources with other elements, such as lighting and audio cues. By creating cues and organizing them on the timeline, you can precisely control when NDI sources are triggered, faded in or out, and synchronized with other technical aspects of your live production.

  • Are there any specific requirements for using NDI in QLab?

    To use NDI in QLab, make sure your computer meets the system requirements for both QLab and the NDI Tools software suite. It is also important to have a stable and reliable network infrastructure to ensure smooth transmission of NDI data. 


    Additionally, consider the network bandwidth and adjust your network settings accordingly to handle the data load of multiple NDI sources if necessary.

    You may also need to pay for a QLab license depending on the features you're planning to use.

By Events Team 16 May, 2024
A Festival of Hope Uniting Thousands of Kids in Song
By Projects Team 04 Mar, 2024
Reach your audience across platforms
a person is sitting at a desk with a laptop running TheatreMix software and an audio console.
By Projects Team 14 Jan, 2024
Learn the ins and outs of TheatreMix from James Holt, the brains behind the software Take a deep dive into how TheatreMix solves many pains of running theatrical productions on live audio consoles with developer James Holt, presented by Tech Direction.
More Posts
Share by: